Up-cycled Valentine Chocolates Boxes


 We started out this week talking about Valentines Day like thousands of other PreK classrooms I'm sure. This was a great math activity that the kids really enjoyed. I think the key to any PreK activity is finding something they like to do, like painting and make it a learning activity. We are really working on one-to-one correspondence and counting to 20 so that was my main purpose with this activity.
  I used 6 cookie cutters, 2 small, 2 medium and 2 large (another concept we talked about) and gave them the instructions to make and count 20 hearts. I let them choose the combination of colors and cutters they wanted to use and had them count out loud as they made each one. I listened and guided them if and when they got stuck on a number but for the most part this activity went rather smoothly. I have only 2 or 3 kiddos that can count to 20 without help and another 12 or so that count anywhere from 13 to 19. The other 5 can usually get to 10 by themselves when counting rote but if I give them an activity they have to concentrate on while counting it throws in a whole new dimension. So there were a couple I needed to count with the during the whole process.
 As Valentine's Day gets closer I wanted to share some of my favorite games that I have created from extra Valentines I had laying around.
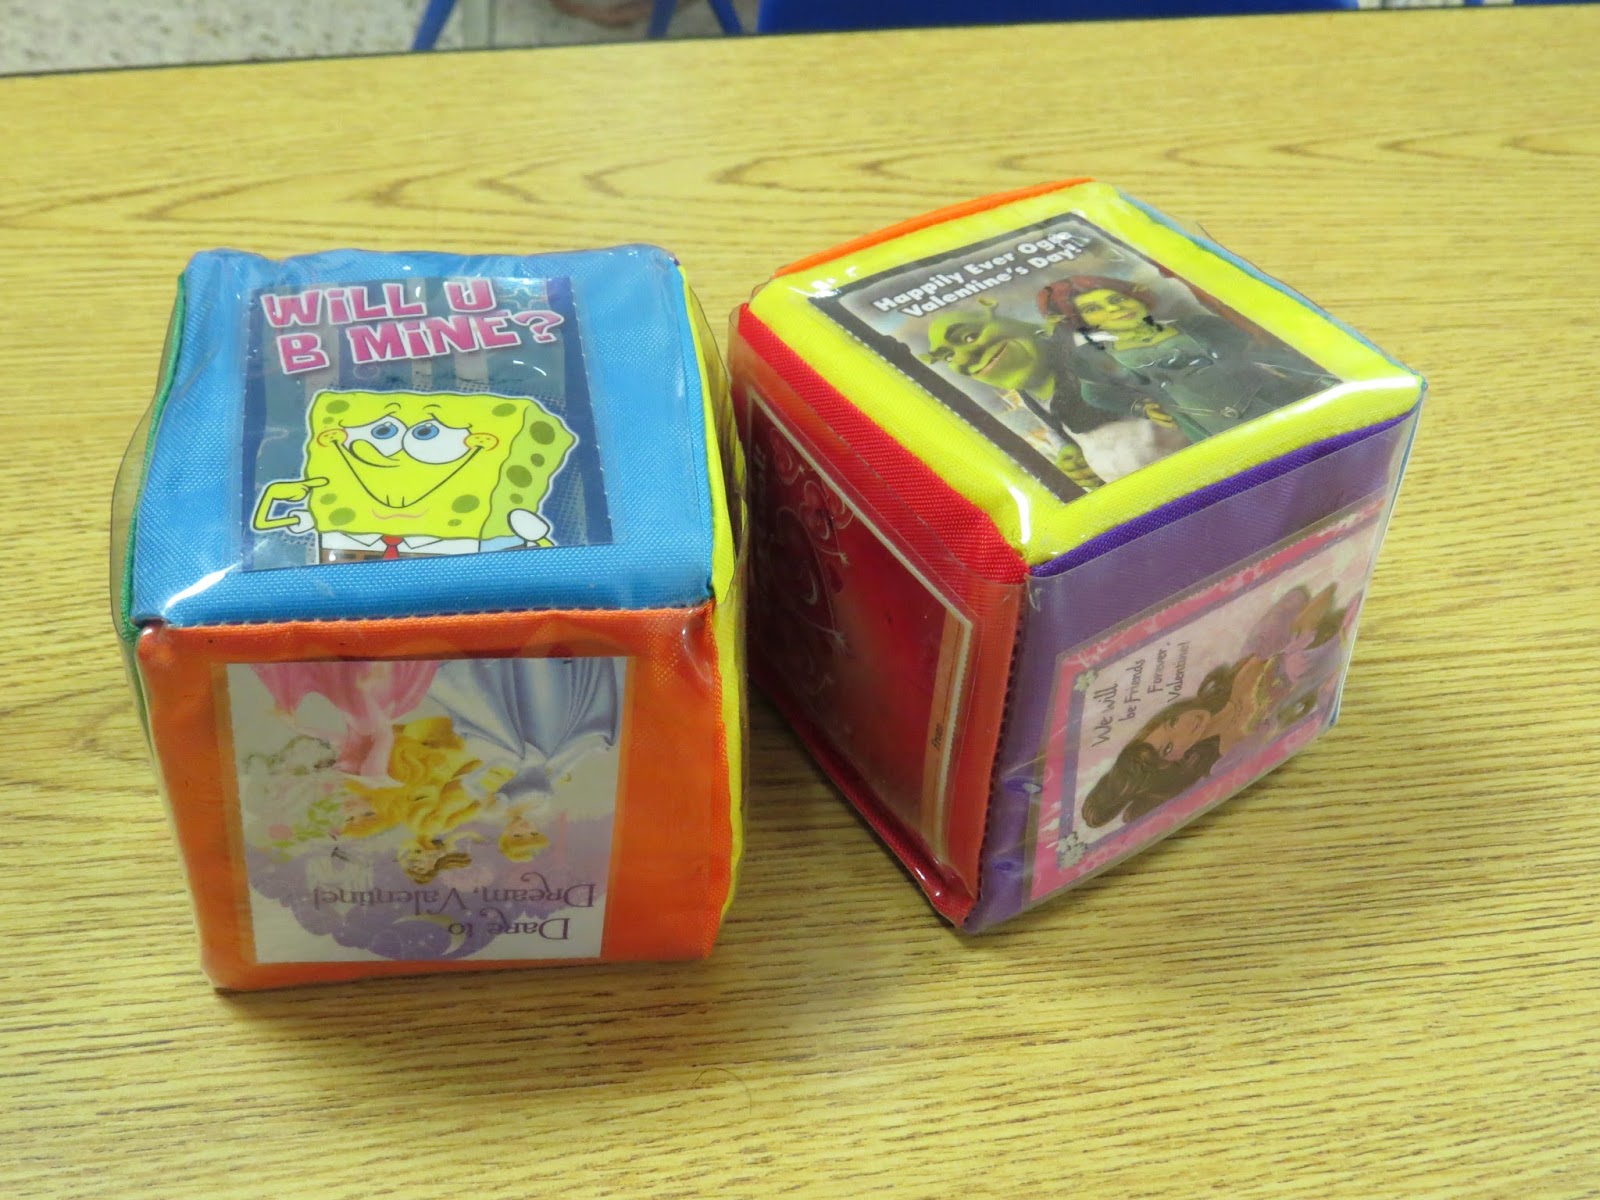 For those kids that have a hard time sitting down for your matching games try adding matching cards to large cubes or dice. The kiddos love rolling them to see if they can get a match.

 You often see non- traditional items in my block center
such as cardboard tubes, newspaper and tape; playing cards, cardboard boxes and these
great cups. As part of adding STEAM activities in the classroom, I love
to give kids "lose parts" to create with. It's hard to be
exceptionally creative with unit blocks that are basically one of about 10 shapes and all about the same size. So I love the variety of adding every day items that they may have in their homes.
You often see non- traditional items in my block center
such as cardboard tubes, newspaper and tape; playing cards, cardboard boxes and these
great cups. As part of adding STEAM activities in the classroom, I love
to give kids "lose parts" to create with. It's hard to be
exceptionally creative with unit blocks that are basically one of about 10 shapes and all about the same size. So I love the variety of adding every day items that they may have in their homes.
 Look at the wonderful organic shapes created in this picture! And do you see the pattern of the clear and silver cups in the picture on the right? The cups are a couple of different sizes and several colors. Some of my kiddos like to build with just one or two colors others don't really care what color they use. The best part of building with plastic cups... cups are cheap! Parents can donate them! and they stack nice and neat and don't take up a lot of storage room!! I added these cups after Thanksgiving and have had to throw away only 7 or 8 cups. The usual reason is someone tries to step over them and accidentally steps on one.
  I obviously give my kids the time they need to build. I try to warn them if clean up time is getting close so they can complete their creations.


 The kids took turns measuring and comparing their heights with their friends. I loved when one of them would look up several inches to a friend and with a flat hand on their head take it up to the top of their friends head and declare they were the same size or taller. When comparing others they could clearly see a height difference but when comparing themselves it was much harder for them.
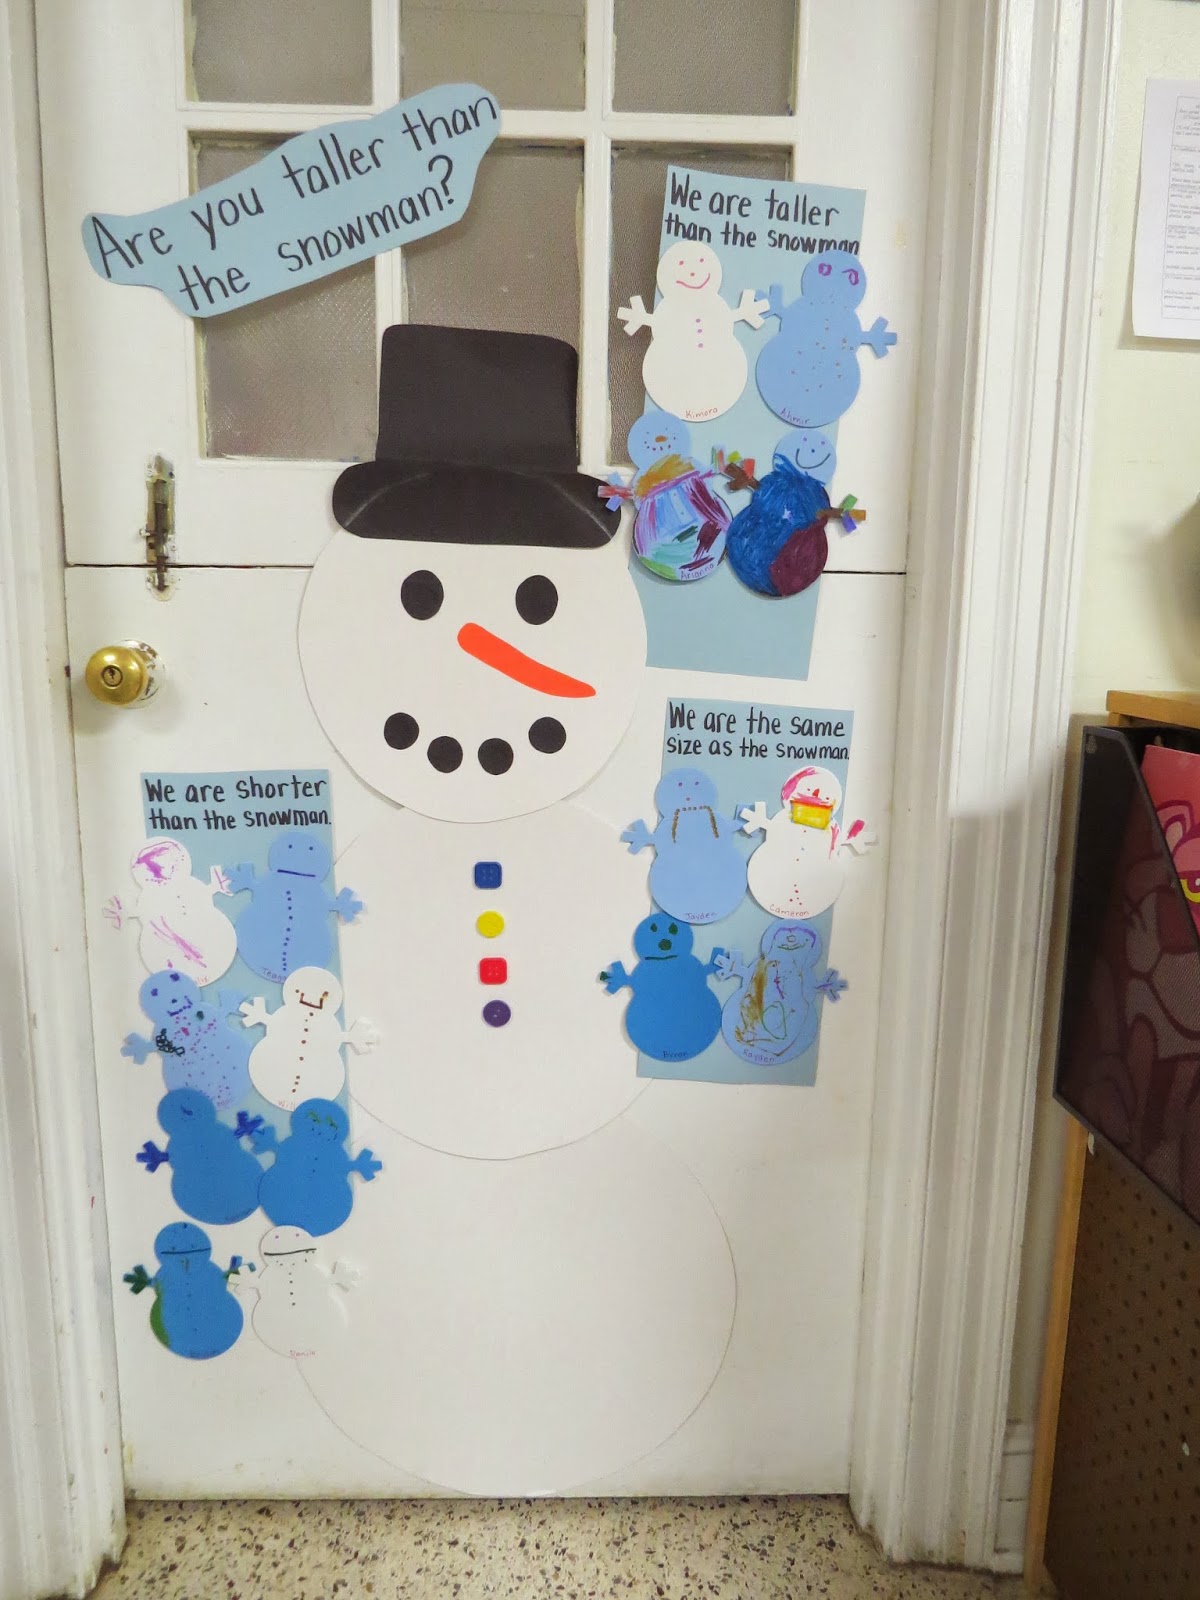 Each of them decorated a snowman with markers before we added them to our door. This worked well for two reasons. First, it gave them each a way to personalize their snowman and make it their own. But it also gave us a way to break up the group of 18 kids so we could get them all measured and on the door in a somewhat orderly fashion.
 As they finished with their snowman they brought it to me at the door and I had them guess if they were taller, shorter or the same size as our snowman. Then we measured. I helped them hold a ruler on the top of their heads and then they stepped away from the door to see where they measured.
  What will happen to our cups of water if we put them outside tonight?
 The kids filled their cups with water, added a squirt of liquid watercolors and then we put them outside of our classroom door.
  We had a two hour delay this morning because of the cold weather and didn't get a chance to check these out until almost lunch time. It was below freezing all day so I didn't think that would matter a whole lot.. lol
 The kids guessed correctly that they would find ice instead of water in their cups. They were mostly right but we found some other interesting things. The color (liquid watercolors) seemed to have separated from the water in the cups with the paint settling near the bottom of the cups. We could see the color through the ice but the tops were clear.


 They were all together against the building though there were some differences such as the amount of water and/or paint in each cup. The kids filled the cups by themselves so some were very full and others had little water in them.
 They talked about how cold the ice was and thought it was really cool when someone turned one over and the colored water went all over the table.
  I loved the designs in the ice and how the paint and the water separated. We had a few kids out today so we still have a few untouched and we put the others back in their cups and back outside without the water from the tables..lol We will look at them some more tomorrow and see what changes we have, if any.
 We did add more conditioner to yesterday's snow dough and made a little more. This time it got put in a ziplock bag to help it stay soft and pliable. The kids (and the teachers) have really enjoyed playing with it.
 Our first experiment of the day was SNOW DOUGH!! There are many recipes out there but I wanted something I didn't have to cook with few ingredients.
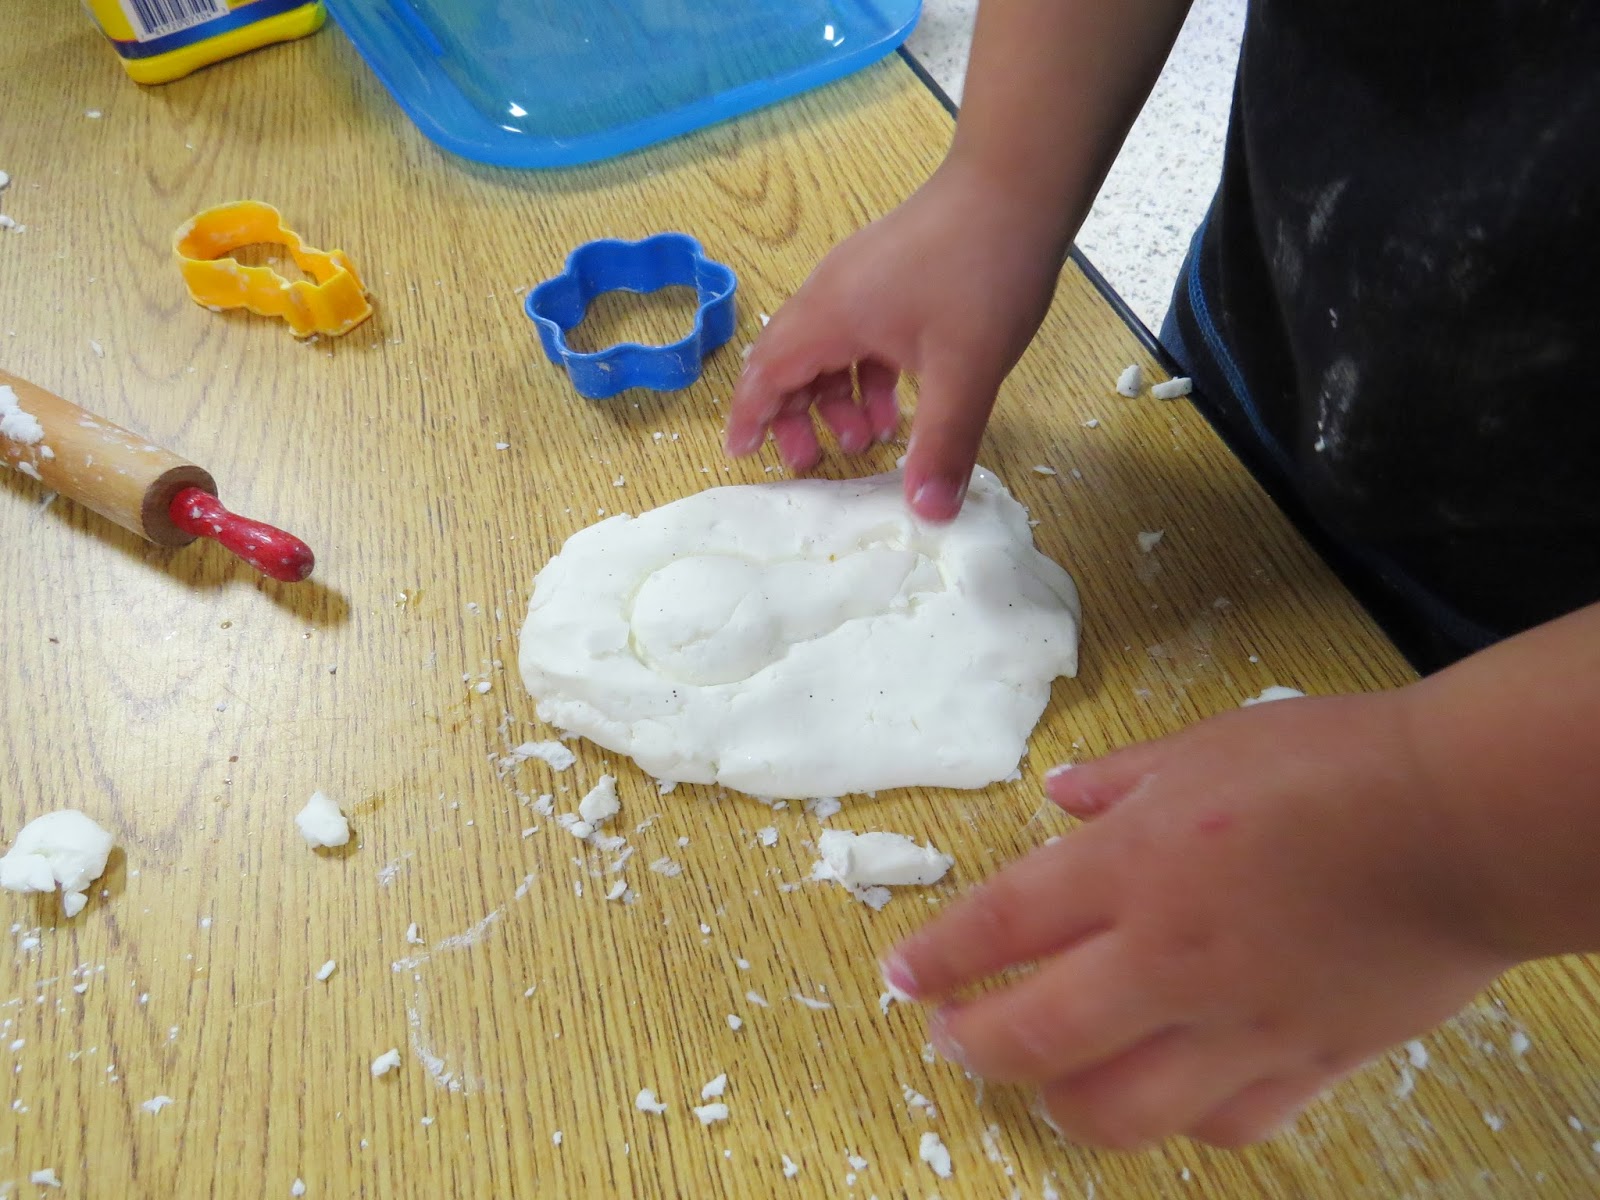
 I didn't get all technical about our recipe. We used Pantene because that's what I had. We also didn't use an actual measuring cup but a couple of empty playdough containers that was in our classroom cupboards. After we got it mixed up well, we had to add a little extra corn starch so it wasn't so sticky.
 If you have the choice I think the fine smaller particle glitter works best with this. We used silver :) This recipe makes the smoothest, softest dough ever, by the way. It also smells really good and made by hands really soft.
 We did make quite a mess on the floor and our carpet had some white footprints but it should clean up pretty easily. :)
 Want to know what else we did today????
 Well it's suppose to be like 5 degrees in the morning (school is actually now on a 2 hour delay so hopefully a little warmer than that by the time the kiddos get there) so we talked about what happens to water when it gets cold and snowmen when it gets warm.. you get the idea. And what would happen if we put cups of water outside tonight? So we did with some liquid watercolors of their choosing to spice it up a little... I also took a moment and talked to the kids about what could happen to our pets if they were left outside in this cold weather and how we should bring them in and make sure they are warm.